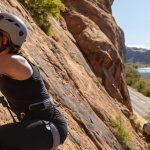
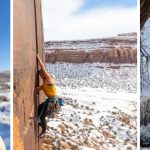
Climbing Photography Basics
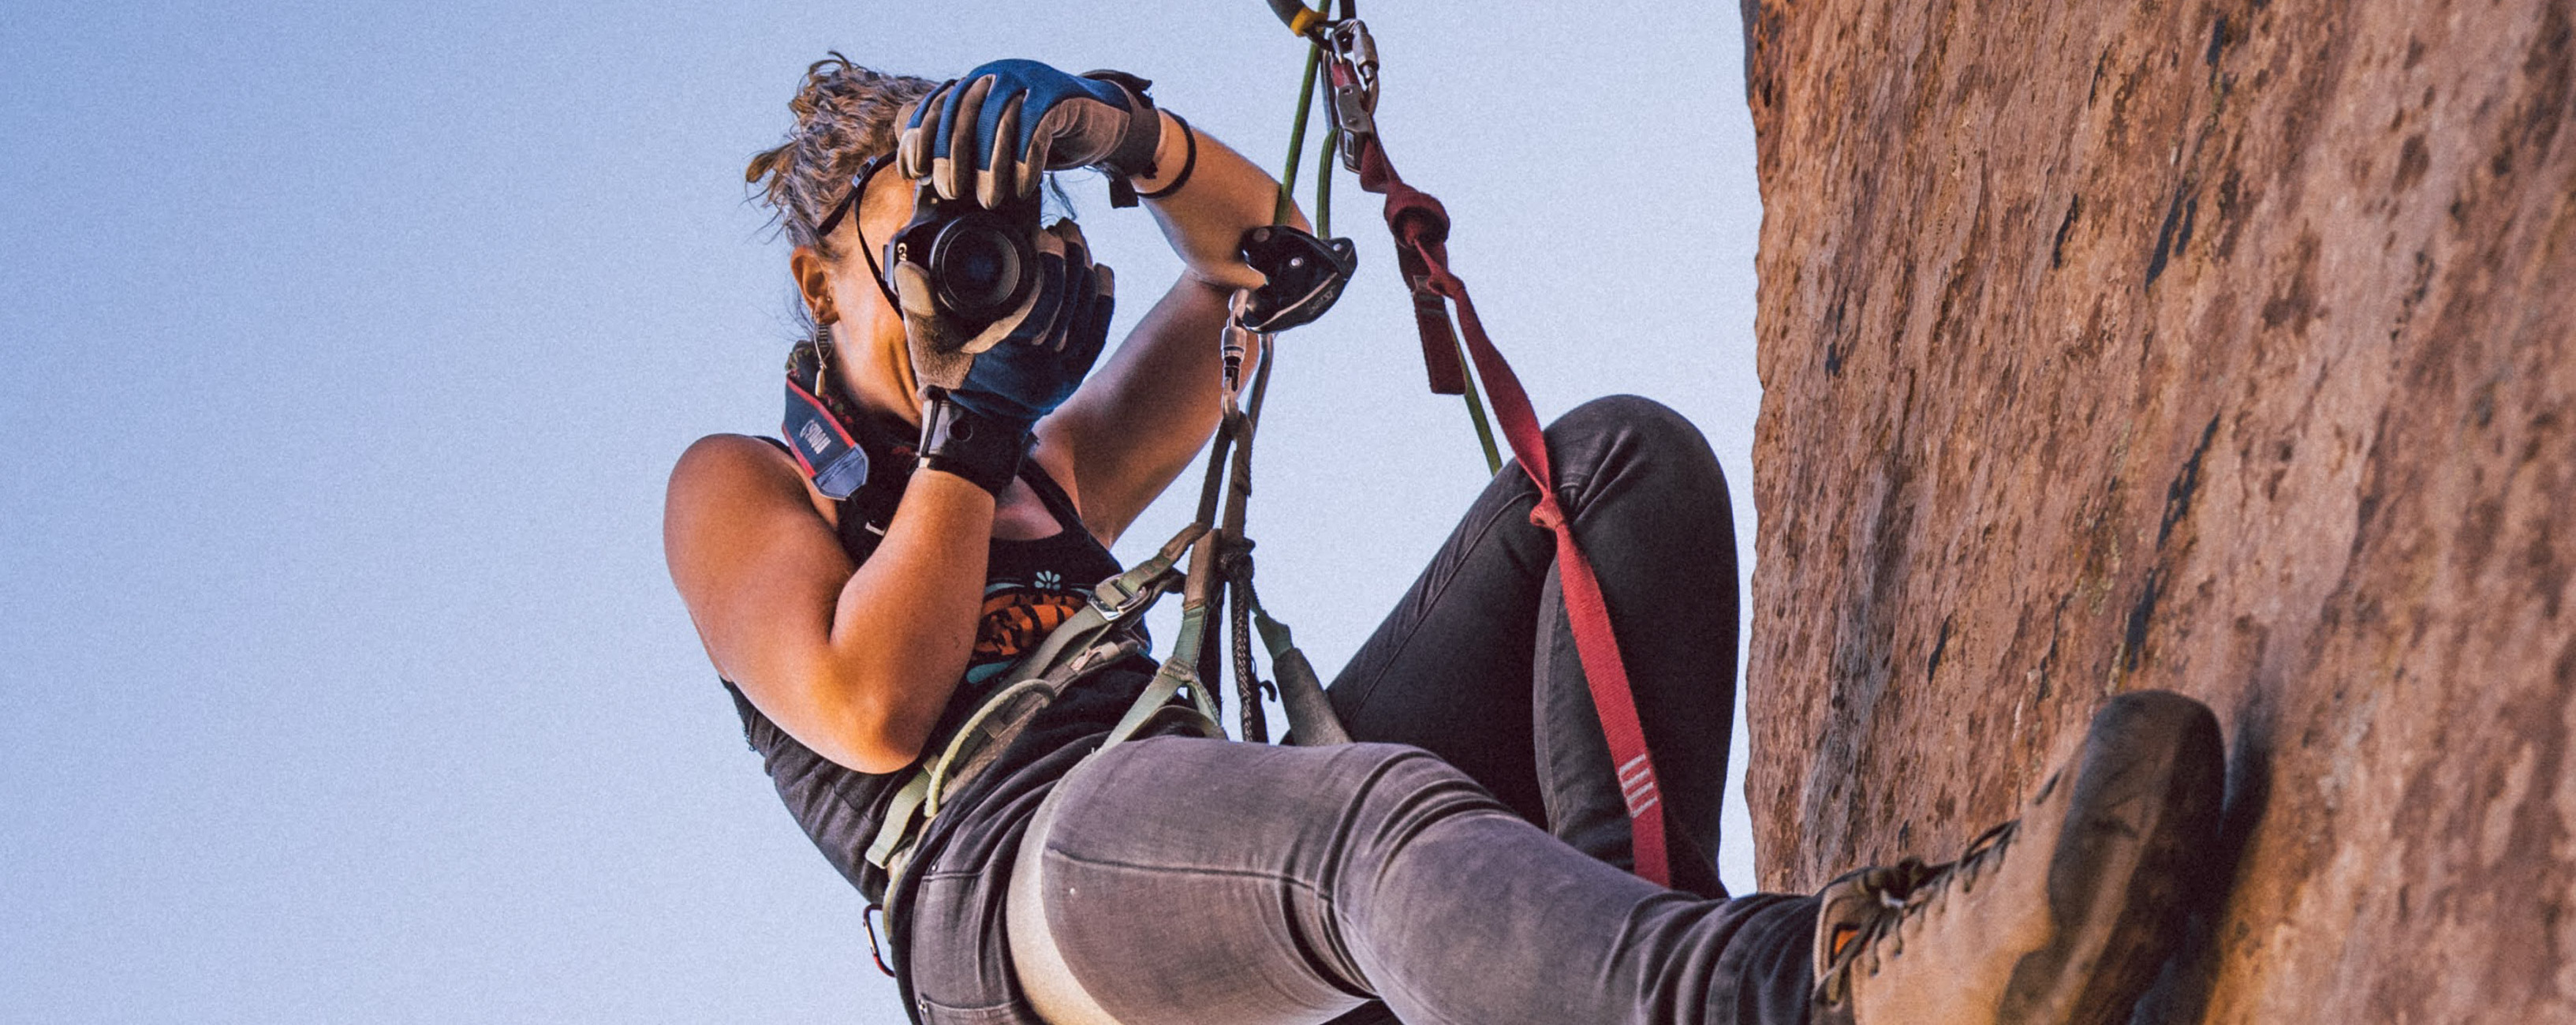
As a rock climber and photographer, learning how to jug a line and take photos from above has been a creative joy. I picked up climbing photography when I had a shoulder injury that prevented me from climbing. Climbing photography allowed me to be a part of the experience of climbing, without doing more damage to my shoulder. I find that although the elements of climbing photography are simple, there are tons of ways to look at how to shoot a climb and how to get the best shot.
Below I’ve included the basics of how to set up a static line, how to jug, and what to look for when shooting from above.
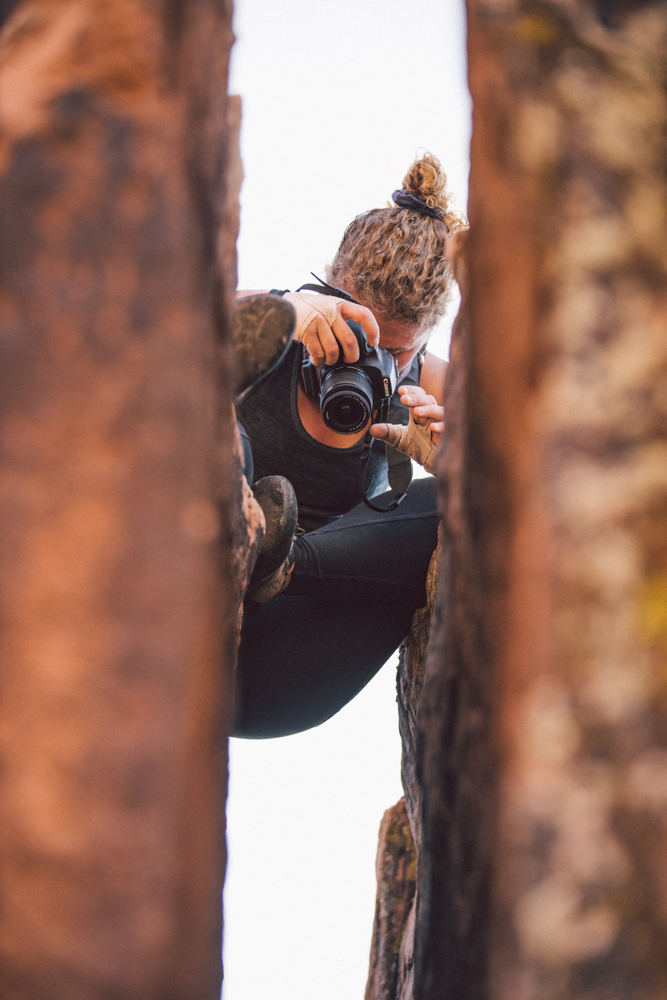
Camera
I have a Canon R6, which I love. But for years I shot with the much cheaper Canon 70D. I don’t think it really matters what kind of camera you have. The most important part is having your systems in place so you can react quickly when your climber is doing something cool. Most often, when I’m shooting, I want a fairly high shutter speed so that when the climber is moving I can capture it instead of getting a lot of motion blur. I typically don’t shoot climbing with a shutter speed of less than 1/500.
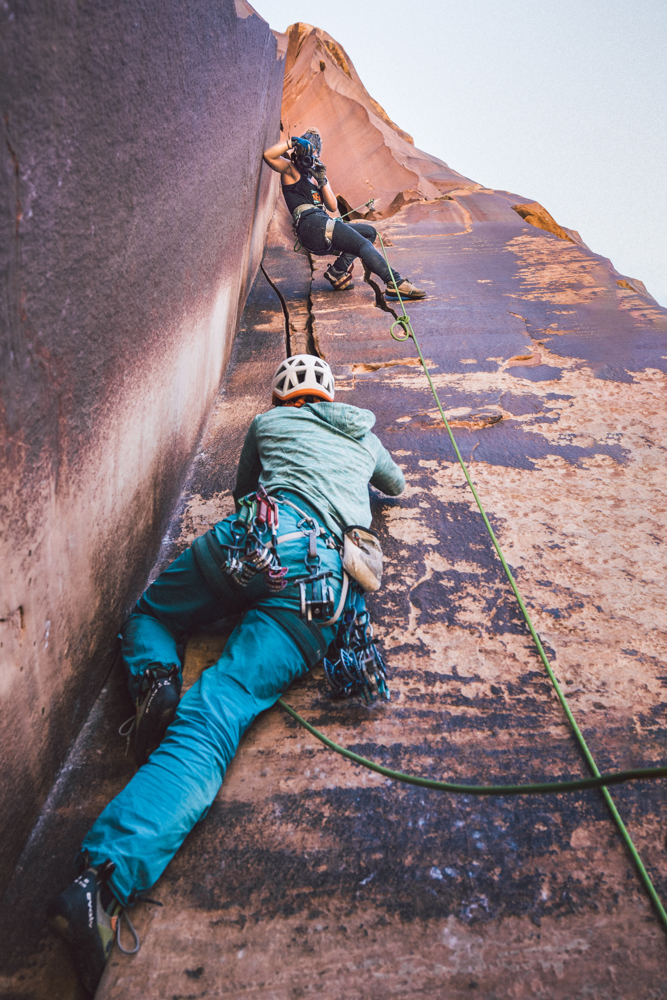
Rope
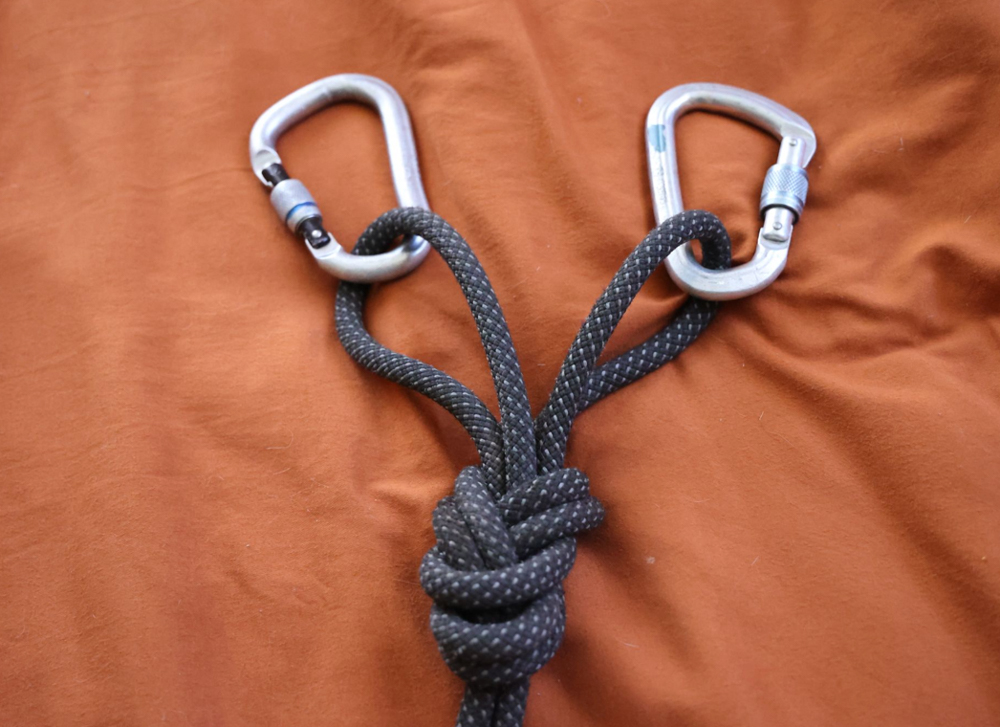
You can technically jug any climbing rope, but it’s much easier (and less damaging to your dynamic ropes) to jug on a static line. I have a 50 meter 9.8 diameter static rope (here’s one from OPL) that works great. When setting up your static line there are tons of ways to secure it to the anchor, but my favorite is the Bunny Ears figure eight (also known as the double figure 8 loop). I tie the bunny ears knot and clip two beefy locking carabiners to the ends. It’s a simple and efficient system. If I’m not going to climb that day, it’s really easy for me to give the pre-tied knot to the climber going up first and say “clip these two lockers to the anchors.” and I know I have a bomb-proof anchor to jug off of.
Harness
I have the Misty Mountain Women’s Trad Harness, but I would highly recommend the Black Diamond Big Gun Harness for comfort. Sitting in a harness all day is really painful no matter which way you cut it.
Ascenders
In order to ascend a fixed-line, you’ll need a Gri-Gri, an ascender (left hand if you’re right handed, a right ascender if you’re left handed), a double-length sling, a locking carabiner, and a nonlocking carabiner. To ascend the rope you put the Gri-Gri on your harness and feed the rope through with the working load above you, meaning if you pull in slack on the grigri it will lock into place when you sit down. This is your progress capture. Now place the ascender on the top end of the rope above your face and use the non locking carabiner to secure it to the rope. This is mostly redundant, but we love redundancy in climbing!
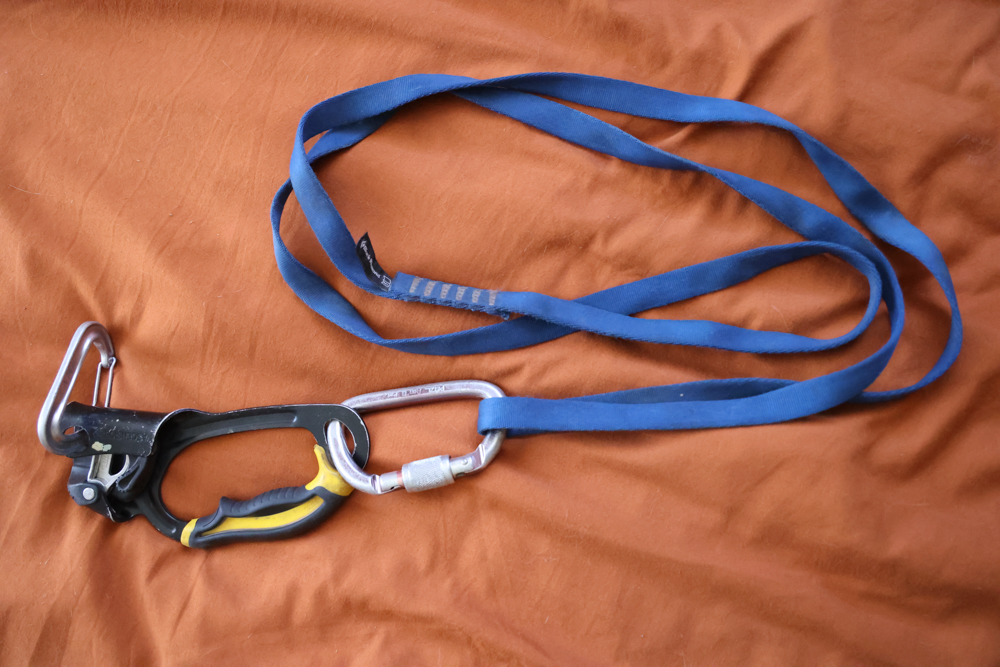
Clip the locking carabiner to the bottom of the ascenter and slip the double length sling through the locking carabiner. Now take the end of the rope (the loose end below the grigri) and loop that through the locking carabiner as well. This gives you a foot loop to stand on (the double length sling) and a way to efficiently take up slack (the loose end of the rope). You want to stand up in the sling and pull in slack on the grigri at the same time to move up. It’s more of a hip thrusting motion than anything else. Once you’ve pulled up slack and you’re sitting on the rope, remove your leg from the double length sling and push the ascender up as far as you can go. This motion is awkward at first, but pushing the ascender, and then standing up in the sling and pulling in slack at the same time is how to easily ascend a fixed line.
There are a lot of ways to ascend a rope, and this is just my system. As you grow as a climbing photographer you will see others systems and might like theirs better. There is no one right way to do this. As always, stay safe and use your head, and tie back up knots in your rope as you ascend just in case!
Gadgets
There are a lot of gadgets that can help make your time hanging on a static line way more comfortable. I’ll outline a few here.
Bosun’s Chair
If you know what line you’re going to shoot and you don’t plan on moving up or down for a while it’s a great idea to have a bosun’s chair. This allows you to sit in a flat seat instead of weighting your harness and the uncomfortable leg loops. The only drawback is that if you need to move up and down repeatedly and quickly, the bosun’s chair can be difficult to assemble and disassemble easily.
Rope Bag
Coiling and stacking rope is a pain, but you really want to make sure you get your rope out of the way when you’re shooting down. If you can hang your rope off your harness and stack it into a bag, it’s really easy to rap down your line at the end of the day.
Hip/Chest Harness
I have a hip harness that I bought on Amazon for really cheap. It allows me to secure my camera to one side of my body while I need to swing around to jug or navigate rocks. You can get them as chest harnesses as well. I find these to be super useful for rock climbing photography, particularly when you’re concerned with bumping into a wall and damaging your camera.
Photo Tips
Climbing photography might seem like a piece of cake, but just being able to shoot down doesn’t mean you’re going to be able to shoot well.
Quick Tips
- Don’t tell your climbers to smile, it feels forced and isn’t what people do when they are climbing.
- Direct shade is better than direct sun
- Only take photos when your climber is looking up at the climb or up at you.
- Ropes in motion look really awesome.
- Try not to take photos when the climber has clipped above their head (unless you are getting a shot of the rope in motion, then definitely do that)
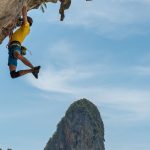
- Sometimes the best shot isn’t from above. Many times you can get an amazing shot by scrambling onto a nearby formation or even shooting from far away.
Not So Quick Tips
The best advice I can give is to tell the story of the climb. What can you see from where you are? Can you see the whole climb from start to finish? Or is this shot more about the climber and the horizon line? Can you get a decent foreground, midground, and background in this shot? Is the shot about the beauty of the landscape and the climber is just there to highlight the experience? Or is the shot about the climbers face and the emotions they are experiencing?
I find the best climbing photos come from photos where you can appreciate the internal journey of the climber by seeing their face, and you can appreciate the beauty of the climb.
Generally, enjoy yourself. Climbing photography is an art form, and you can experiment with it as such.
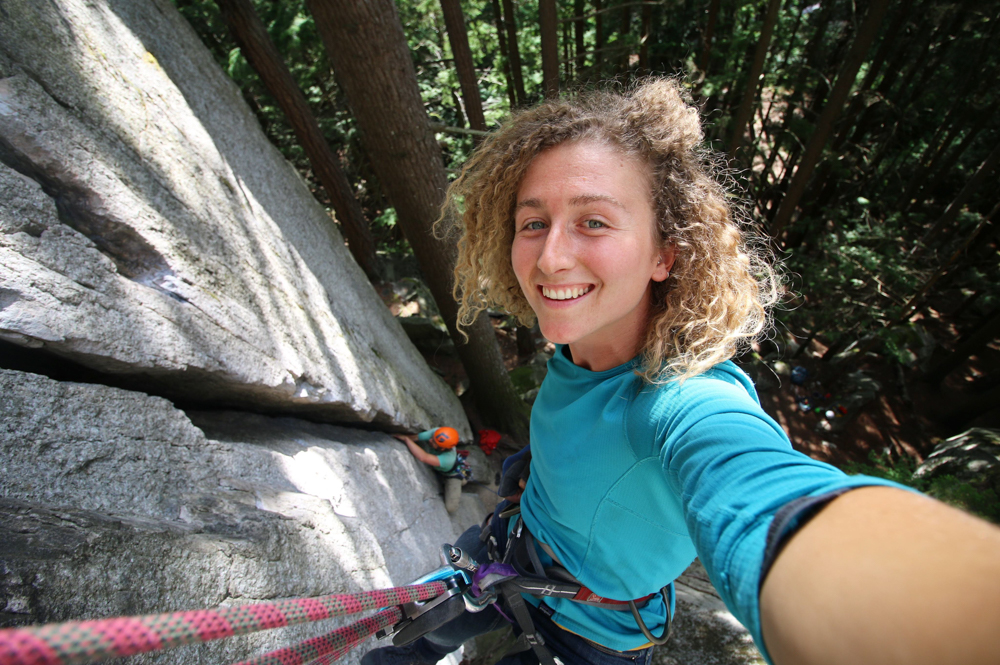
About the Gear Tester
Kaya Lindsay is a writer, photographer, and filmmaker with a passion for rock climbing and the outdoors.
In 2016 she converted a Sprinter Van into a tiny home and has been traveling around the US & Canada to pursue her passion for rock climbing. Since hitting the road she has begun a career in filmmaking and is currently working on her One Chick Travels series, highlighting solo female travelers who live and work to pursue an adventurous lifestyle. Her films have been highlighted by major brands such as Backcountry and Outside TV. To fulfill her passion for writing, she chronicles her many adventures in her blog. Professionally, she writes for the adventure sports company Outdoor Prolink and The Climbing Zine. Kaya hopes to spend many more years in her tiny home on wheels, Lyra, and is currently living in Moab Utah.
-
Kaya Lindsayhttps://blog.outdoorprolink.com/author/kaya/
-
Kaya Lindsayhttps://blog.outdoorprolink.com/author/kaya/
-
Kaya Lindsayhttps://blog.outdoorprolink.com/author/kaya/
-
Kaya Lindsayhttps://blog.outdoorprolink.com/author/kaya/
This is helpful! I’ve recently stumbled upon a passion for photography and specifically for when I’m camping or climbing of any form. Just to get cool shots of my friends. Just cool things in cool moments. How do I get out there? Is it building a presence on socials?
Hey Ryan,
Building a presence on social media certainly has its benefits, but its not necessary in order to be a climbing photographer. I would start practicing your craft, build a portfolio, and get to know the local climbers in your area. You’ll learn a ton from getting out on the ropes yourself, and since the climbing community is small, you’ll definitely meet some people who are looking to hire photographers!
Best of luck 🙂
Hey Kaya,
Thank you for the blog post! It is really hard to find a photographer in the local climbing community.
Such a great article Kaya!
This is a discipline of photography I am going to be pursuing soon, as well as cave photography. Two of my favourite pastimes yet I never really considered bringing my photography into it until now.
One I would like to know if you wouldn’t mind sharing are the AF settings you like to use. Do you always stay in servo or do you use one shot, and which focus area do you find has brought you the best results, using a zone or a single focus point?
Thank you so much!
Chase
Hey Chase,
I keep my camera on auto focus, but I don’t have it track faces. For some reason the auto focus doesn’t like to recognize people with helmets and or sunglasses on. I like to keep everything in a single focus point and change the framing of the photo as needed. The tracking hasn’t worked super well for me, but I know a few other photographers who swear by it!
I highly recommend you play around with both and figure out what works best for you.
Good luck out there!
Hi Kaya,
This is an awesome article, I’m an experienced photographer but starting out in climbing photography and struggling with finding the right bags and straps/tethers to carry gear while on the ropes. Would you have any recommendations for this?
I try to bring as little equipment up with me as possible, just for the ease of moving around. If I have to bring a bag, I like the Black Diamond Creek 20 for small items. I clip everything to my harness with rated carabiners. I have friends who like the metolius big wall stuff sacks for their ropes, but I usually coil mine and hang it off a sling on my harness. Good luck!