Crampon Fitting 101
“This climbing season, get your feet what they really want: a bunch of shiny blades to wear.”
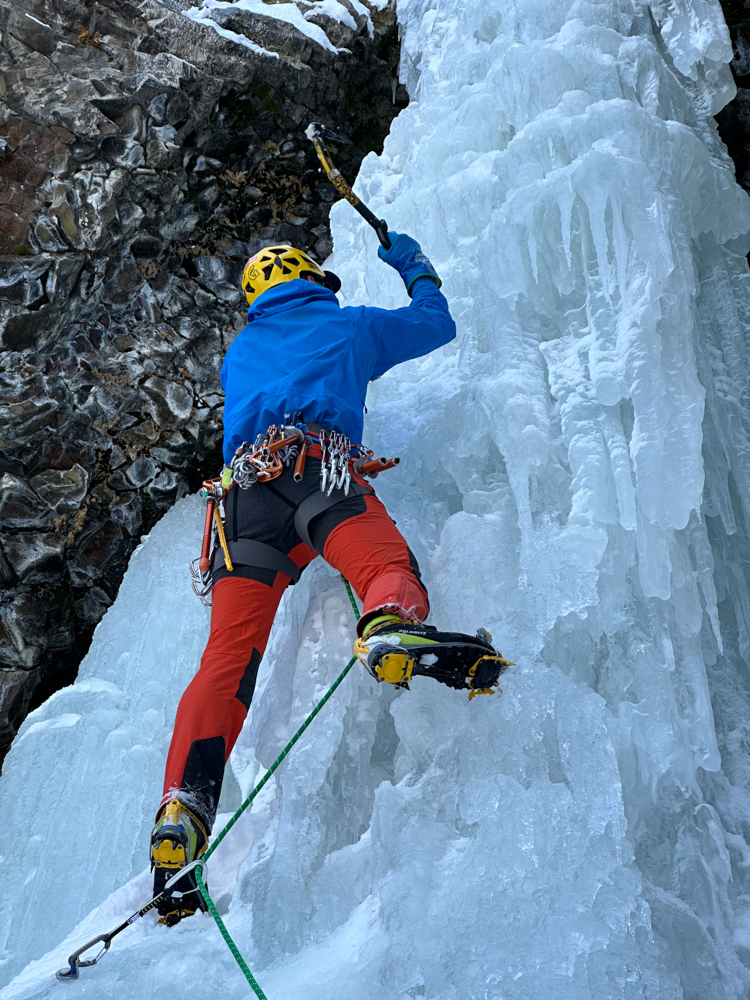
Do you love hiking in the mountains but wish there was some way to continually cut up your pant cuffs? Maybe you love sport climbing but there isn’t enough stabby punishment for your belayer when you whip down into them off the second bolt. Or in all seriousness, are you looking to climb in the slippery environments of ice and snow and want a way to secure your feet to those mediums? Well, look no further than a shiny new pair of crampons, ready to strap onto your feet and do some serious damage to rock, ice, snow, and hopefully not your belayer or ankles! Crampons will keep you securely planted on snow and ice when the rubber on your shoes or boots just won’t cut it. They are a must for anyone venturing into alpine environments where you need added traction for your feet to ensure safety and progression.
Crampon Attachment Types
If you are just buying your first pair of crampons, or maybe upgrading to something more technical for a winter season, the first thing you need to ask yourself is, “which ones will fit my boots?” There are a lot of different options out there, so finding the right style is important to getting it on your feet securely.
Universal Crampons
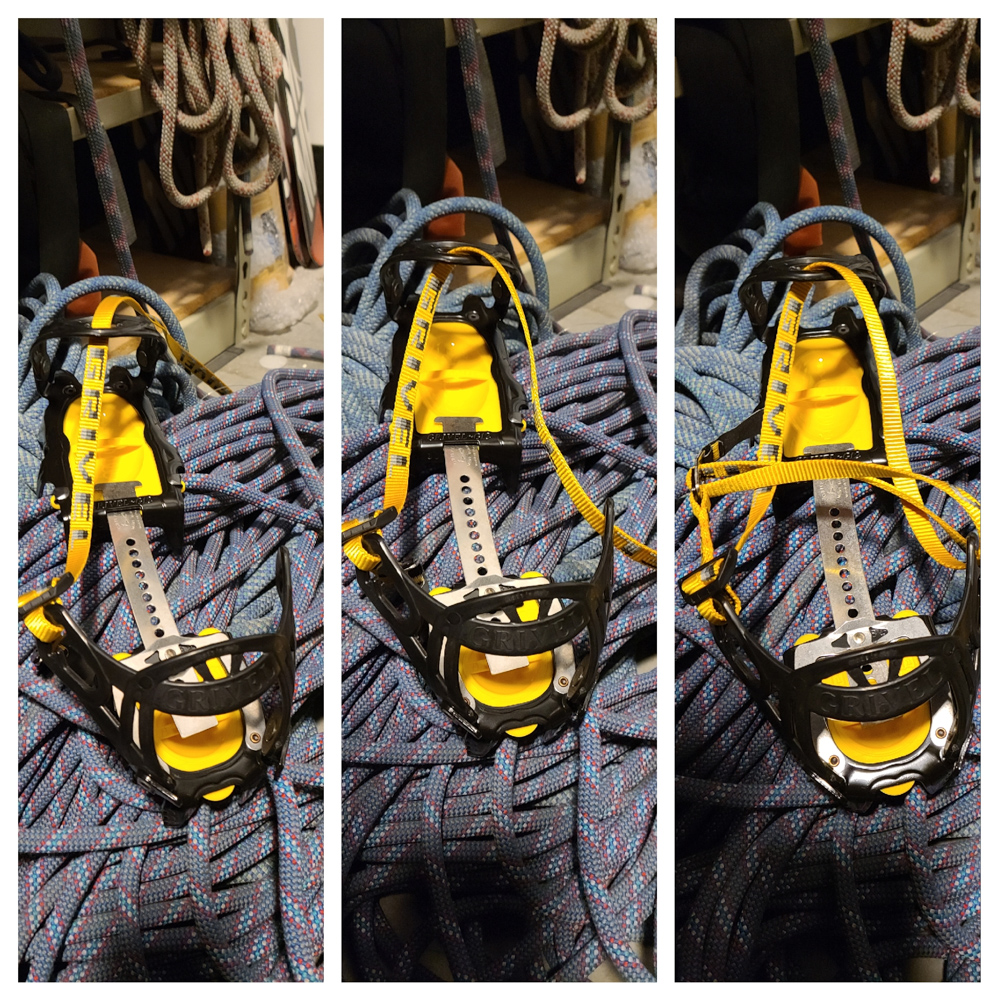
Universal crampons are designed to do as the name implies and fit on any style of footwear, and while this isn’t always true, the plastic stirrup, toe cap, and webbing strap do tend to wrap themselves well around just about anything. I have often seen the strap set up wrong on this system, and proper wrapping is necessary to ensure a snug fit. The webbing starts on one side of the ankle, runs up to the toe cap, down to the opposite side of the ankle, and finally across the instep to the original side of the ankle to join with the buckle. This system tends to work poorly on ski boots where the bulky nature of the boots and many buckles tends to interrupt the tightness of the fitting. It should also be noted that certain brands make a wide configuration of universal fit crampons, which are crucial for things like snowboard boots and even some high elevation boots where the large size makes regular crampons fit poorly.
Full Automatic Crampons
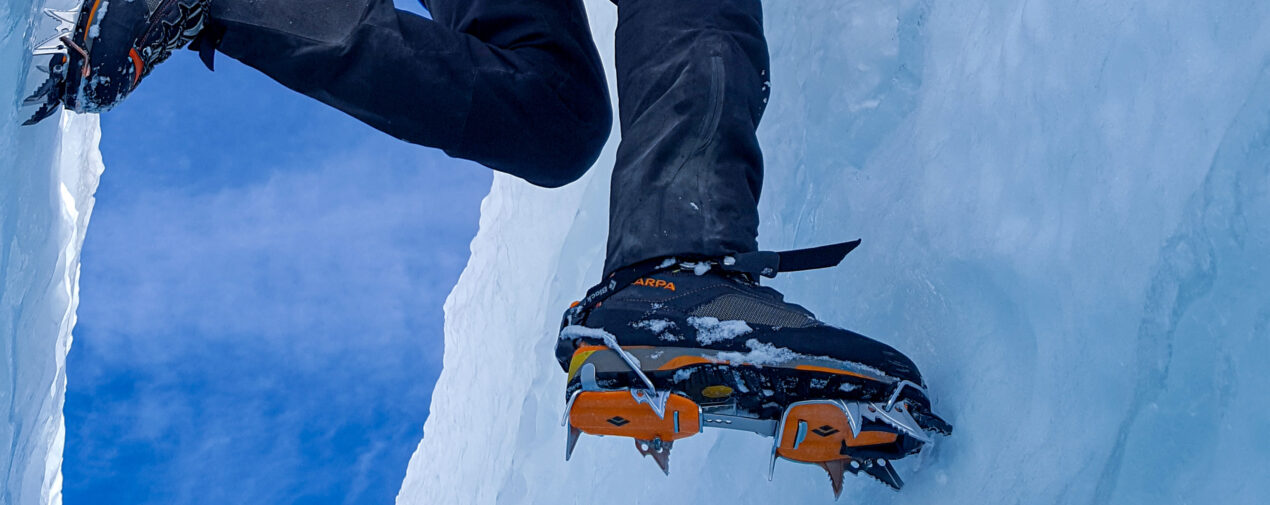
Full automatic crampon bindings are the fancy flashy ones that nearly everyone has on their technical climbing boots. Many people liken their usage to that of a ski binding, since the process is snappy and requires no tightening of straps to secure the crampon (although a strap is still used to keep the crampon from flying away should anything go wrong with the assembly). This crampon attachment system is generally the most boot restrictive, requiring that the boot has both a toe and heel welt to accommodate the two bails. You start by sliding the groove of your boot’s toe welt into the wire toe bail, and then use a lever on the heel bail to snap it into place and hold the crampon in tension on your boot.
Semi-Automatic Crampons
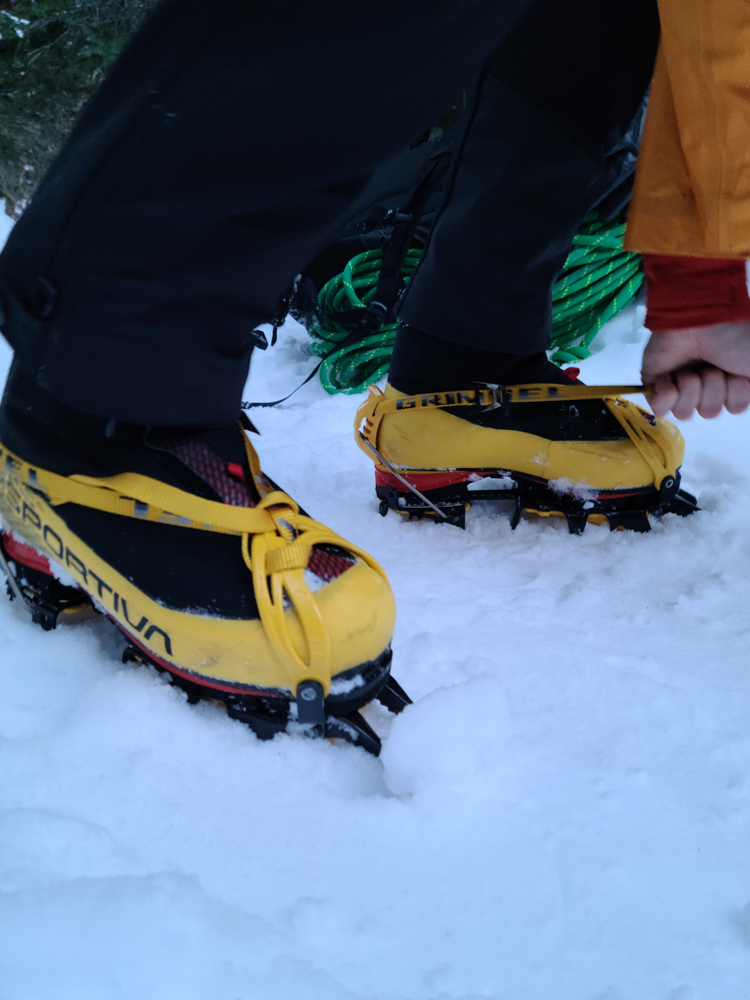
Semi-Automatic crampons are the in-between, using parts from both other styles and coming with their own advantages/disadvantages. With a heel lever bail in the back, it is slightly more restrictive in boot choice, requiring a boot with a heel welt. However, a toe cap like the universal in the front allows it to fit over the toe of any boot. With this setup, a strap is still used to keep the crampon in place, but it doesn’t take nearly as long to strapon as the universal model. Many people think this style is inferior to the full-automatic attachment when ice climbing, and while it might not be as sexy, the toe cap is just as solid when kicking into ice, and I know several ice climbers who prefer this setup since the toe cap is less likely to break or bend out of place compare to a wire toe bail.
Crampon Front Points
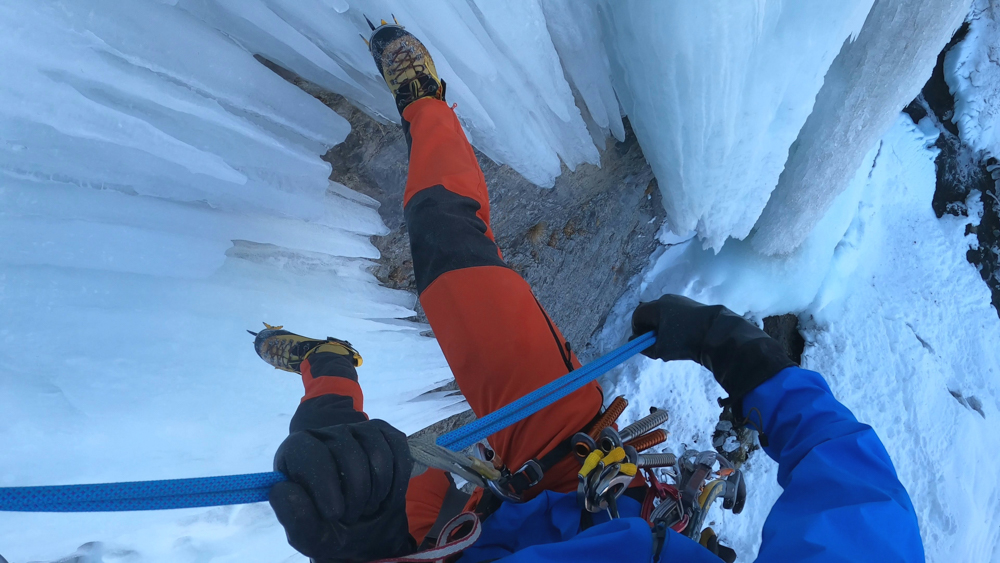
Before you get your crampon on your foot you’ll need to pick the right one for the job, and different crampons have varying spikes to fit specific needs. The classic crampon has an array of spikes underneath to aid in traction when walking, and two points sticking out the front that are the primary contact when climbing. Traditionally these are flat and wide, oriented horizontally, and focused on providing surface area in snowy terrain. While these points can sometimes come out of the box pretty sharp, they aren’t very effective at climbing on ice, since the wide nature of the point doesn’t allow it to penetrate hard ice easily.
To get into hard ice, you will need a more technical crampon with “vertical” front points. These normally come as replaceable parts since they need to be sharpened often for better performance, and they look similar to an ice tools blade with downward curve and a few jagged teeth. Some crampons with vertical points might only have one front point, or come with the option to switch between a “dual” or “mono” setup. These two variations come with their own set of advantages/disadvantages, and are sprinkled with a bit of personal preference.
Personally I prefer a good mono-point crampon on technical terrain so I will feed you a few of my own biases to sway you my way. Mono-points are almost a necessity when using crampons on difficult and technical rock pitches. The single point of contact in the front allows you the rotational ability to set your foot in more nooks and crannies, while dual points would interrupt each other and kick your foot off the rock in these positions. Mono is the undisputed champion of dry tooling, but I also prefer it on most ice climbs where the single point displaces and fractures less ice when kicked in. Most people think that dual points will provide them more stability in ice, but your stability actually comes from the two secondary points behind all the business up front. The one place that dual-points definitely reigns supreme is in heavily chandeliered ice, where an open lattice of icicles means a single point more easily slips between the ice and doesn’t gain purchase.
Fitting Crampons
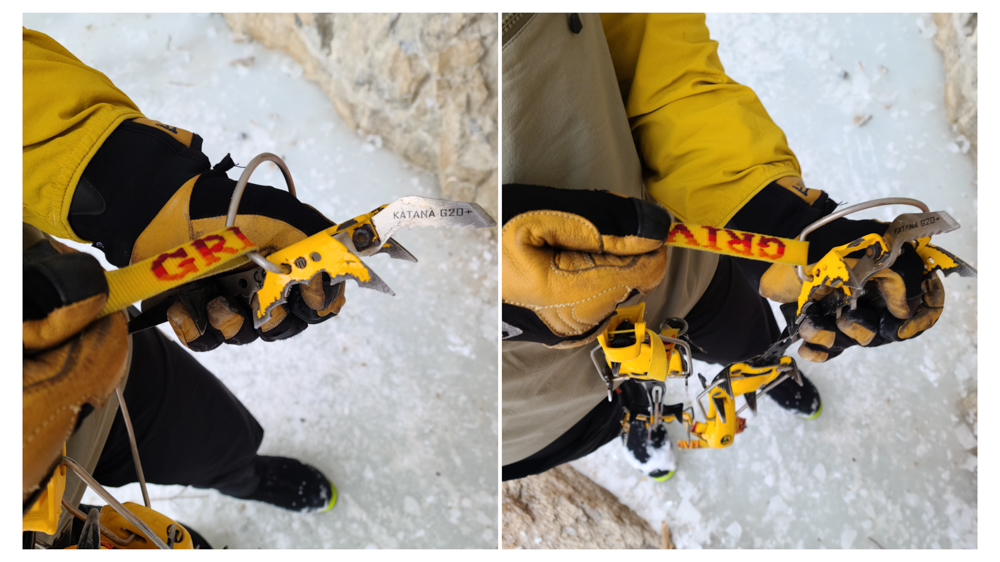
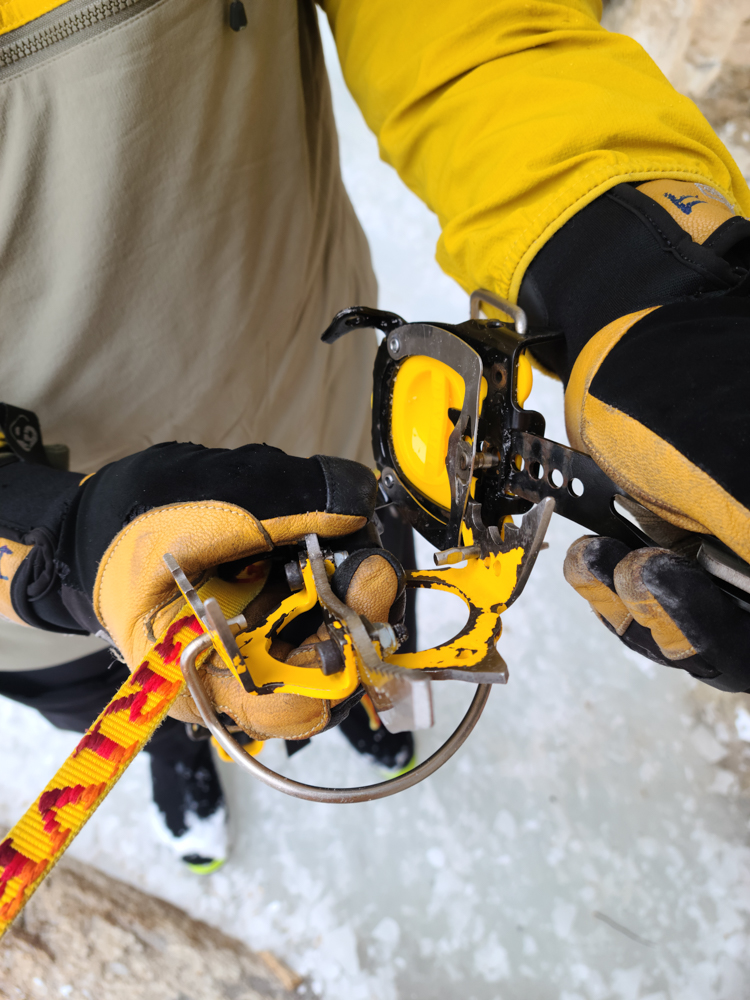
While the debate of mono vs. dual on ice may range back and forth depending on conditions or preference, the one thing all crampons need is to be well fit to the boot they are on. Crampons come with a variety of adjustment points for you to best fit them to your specific footwear and needs, and in my opinion the more options to tweak the better. Starting at the front, technical crampons with a wire toe bail will normally have two to three positions that this bail can be set into. This allows the positioning of the front points to be set at different lengths relative to the front of the boot. To adjust you need to pull the bail out of place at a specific angle, which can be tricky and painful using just your hands. To help this process, I take the strap of the crampon or its partner, and wrap it around the edge of the bail to gain leverage and protect my fingers.
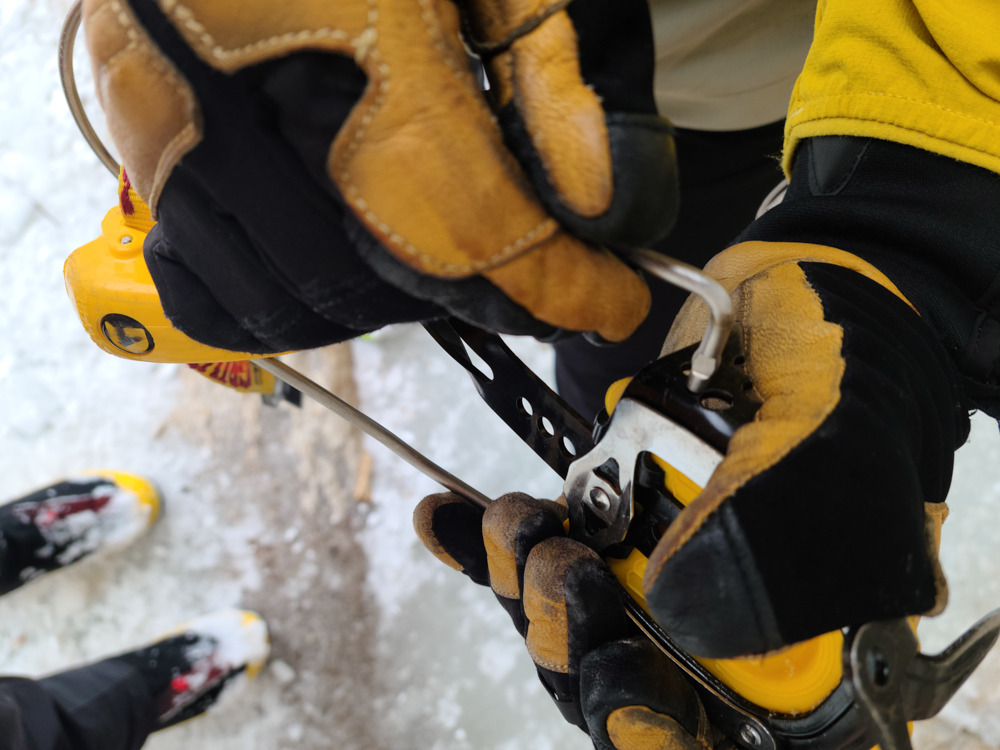
Next, nearly every crampon will have a linking bar that joins the front and rear sections together and allows the most drastic form of adjustment. This linking bar will have a line of holes in it that a pin slots into to size the crampon to larger or smaller feet. Lifting the pin allows you to slide the bar to different holes, and you should choose one so that the heel section sits snug on your boot while the toe of the boot is firmly in place. The best way to tell if the heel section is in the right place is with two metal nubs, or “wings”, that stick up on the back of the heel section of each crampon. On universal styles, these metal wings are where the plastic stirrup is riveted onto the metal heel section.
After the heel section is close to the back of the boot, there is more fitting to be done if your crampon has a heel lever bail. To get a snappy and tight fit on this lever, most models will have a couple bail positions similar to a wire toe bail. Some heel levers will have a final adjustment point that allows the plastic lever on the heel bail to be fine tune adjusted to get just that extra bit of snappiness on the heel welt. With all these options, you should fine tune your pair to make sure no unwanted slips or pop-offs happen while in steep or icy terrain.

Other considerations
With your crampons picked out and well fitted to your boot you are ready to head out into the mountains and get to scratchin’! Having crampons on your feet can take some getting used to, and beginners are normally likely to snag their pants and trip themselves up. To help with this you can wear gaiters to protect and prevent snagging. Or if you buy some mountaineering specific pants they normally come with narrower cuffs for the same reason. And if you are ballin’ on a budget, a quick wrap of tape or elastic bands will help keep your baggy resort pants from getting shredded. Once you get more comfortable with crampons, snagging will become less likely and you won’t burn through so much gear tape every year.
One final feature to pay attention to is anti-balling plates under your crampons. To keep wet snow from clumping underneath and preventing traction, most crampons will have plastic forms underneath the toe and heel sections. The idea is that when you put your weight on your foot, these plastic forms will compress down, and then when weight is removed they will spring back out and eject snow that has begun to clump around the spikes of the crampon. It is important to note that this process sometimes starts failing to clear snow in really sticky conditions, and not all anti-balling plates are created equally. Some brands hold patents on anti-balling designs that work far better, while other brands have similar, but lesser well-functioning designs.
Gear By Name
Beginner Crampons
Once you have the gear questions worked out, it’s time to hit the slopes! For a beginning crampon, most folks will probably have a universal fit so that it will work with whatever footwear they use. Maybe you are hiking up a peak covered in firm spring snow and want something to fit on your trusty hiking boots, or you’ve just rented some heavy mountaineering boots for a trip up Mt Rainier.
For either of these scenarios, something like the:
Black Diamond Contact or
Petzl Irvis Flexlock crampons will do great.
Intermediate Crampons
But let’s say my spring climbing takes me to a peak where I might want to climb some steeper snow, and maybe even encounter some low angle ice? My fancy 3-season boots have a heel welt, but no toe welt for full-automatic crampons.
I will go with a semi-automatic crampon like the:
Grivel Air Tech New-Matic or maybe even a
Petzl Sarken
A crampon like this means I can easily fit it over the toe of any boot, but the heel lever gives me a sturdy platform when kicking and climbing.
Steep Ice Crampons
Or for those looking to get on steep ice, you will need to find something with the features for that sport.
The Petzl Dart is a great crampon that allows you to choose between mono or dual points in the front, and replace them when they get bashed down to butter knives.
But for the crampon connoisseur that has all the versatility they need in their quiver, the Grivel G20+ is focused only on hard technical climbing, and in my opinion outshines the competition in this category. I should note that it has no anti-balling plate in the front, partially to save weight and partially because the sporty front section doesn’t have much space to put one in. But they stick like a dream with just a light tap in, and the stiff linking bar means they won’t wobble or wiggle on you like those with sliding linking bars.
Snow Climbing Crampons
And we can’t forget those crampon users who are more downhill inclined, the skiers! Most will want a less technical crampon for simple snow climbing, but need it to have full automatic attachment to fit their boots.
Things like the:
Black Diamond Neve Pro or the
Camp Xlc 390 work great for these conditions and shave down weight so that you wont notice it in the pack while carving back down your slope.

The Final Word
Now that you know the ins and outs of crampon craft you should be well equipped to get your first (or fourth) pair and get climbing! Depending on your objectives, this could mean a universal fit crampon with two horizontal front points for your mountaineering on glaciers and steep snow in the local mountain range. Or you need a vertical machine for tackling those technical pitches at the ice fest next year. Either way, you have the info you need to get that sucker secured to your foot and fit to the right environment, so get out there and get kicking!
About the Gear Tester

Evan Watts
Evan grew up in the small hometown of Boring, Oregon, where he cut his teeth hiking and backpacking in the local Cascades. He now enjoys ice climbing, backcountry skiing, and trail running around in the Western States, and manages to fight off permanent employment despite an environmental engineering degree and perturbed parents.
-
Evan Watts#molongui-disabled-link

-
Evan Watts#molongui-disabled-link

-
Evan Watts#molongui-disabled-link
-
Evan Watts#molongui-disabled-link