How to Take Your First Spring Hut Trip
Preparation, Planning, and Packing for Your First Backcountry Skiing or Splitboarding Hut Trip
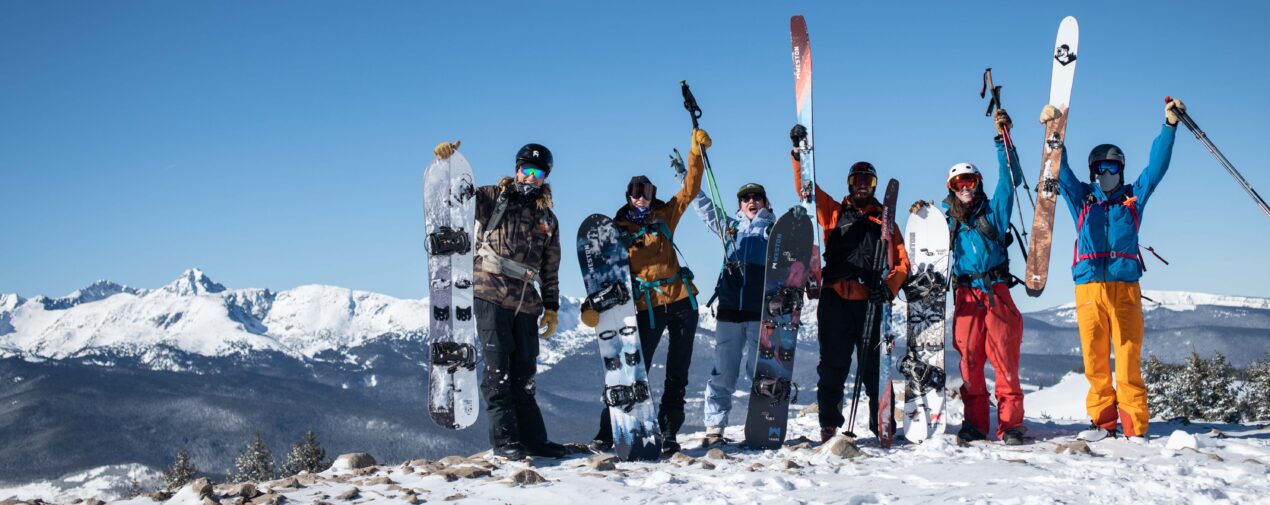
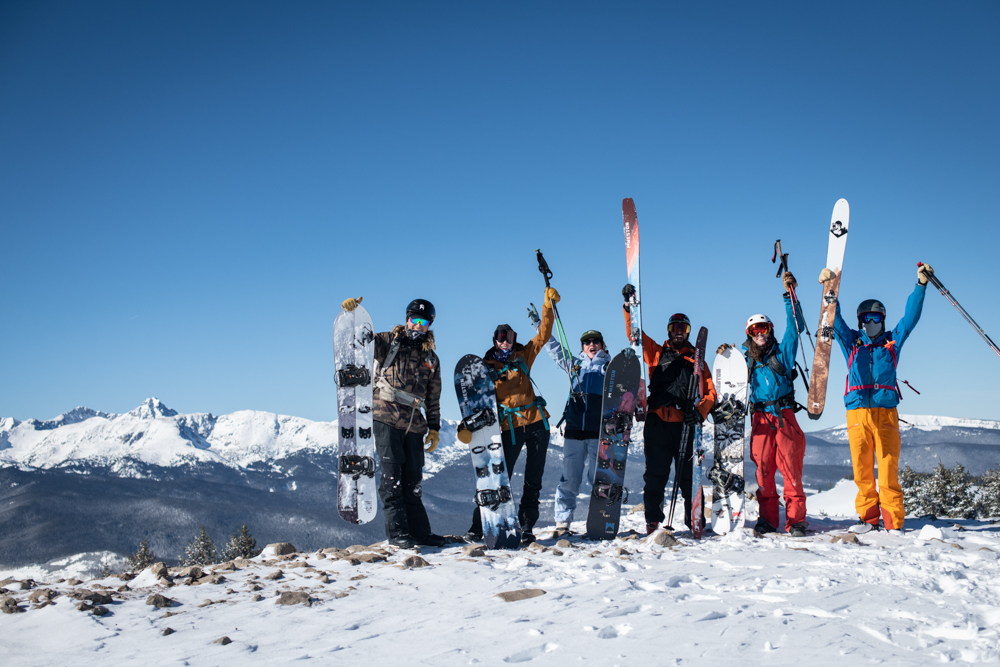
Six friends, four days, and one beautiful, off-grid alpine hut: a recipe for good times! Right? Definitely—when the conditions line up! Heading out into the backcountry for multiple days can open the door to unforgettable experiences. But what goes into planning the perfect backcountry hut trip? Great preparation, safe conditions, and good packing form the trifecta of a good ski hut trip.
Hut Preparation 101
1. Be honest about your skillset, and choose an adventure accordingly.
Choose a hut adventure that provides access to terrain within your skillset. This facilitates having a successful and enjoyable trip. Planning to stay at a hut with terrain beyond your skillset will not only hamper your (and your group’s) experience, but it can be downright dangerous.
2. Explore and plan your intended route of ingress and egress well beforehand.
Definitions of Ingress and Egress:
Ingress: your access route, i.e. the route by which you will ski uphill to the previously communicated transition/downhill/”drop point”
Egress: your exit route, or as Miriam-Webster says, your “place or means of going out.”
Review both paper and digital maps before setting out to the hut to get an idea of the terrain that you’ll be traveling on. Digital mapping applications like Gaia GPS, onX Backcountry, and CalTopo will allow you to download your maps for in-field navigation. Fatmap is another option to explore: it creates beautiful 3D renderings that can facilitate choosing ski objectives. Haven’t tried any of these options? Give them all a whirl, and see which one works best for you.
Note that all these apps do have both mobile and web/desktop versions. The web/desktop versions greatly help during the planning phase, and also allow you to create maps/routes to share with friends that will accompany you.
No navigation plan is complete, however, without having a physical, paper map and compass on hand (and the skill to properly use them). Phones break, batteries die. Being left without any proper navigation tools in an unfamiliar zone could spell disaster. Getting paper maps at a local outdoor gear store or REI is the best, most fail-proof solution. Don’t know where a store is? Just Google “Outdoor store near me.”
3. Plan Well in Advance . . . but Embrace the Bail
While some informal, word-of-mouth huts do exist, the vast majority of huts are well-known, experience heavy visitation, and . . . require reservations made well in advance. Book these reservations to plan your trip, and pay attention to local avalanche conditions in the weeks leading up to your trip.
That said: sometimes conditions are not a go, and it’s important to recognize these signals. It is more than okay to bail. Managing risk and responsibility means more than ever when you’re in a remote hut in the mountains.
What Is “Scary Moderate”?
Backcountry Magazine says “scary moderate” (not to be mixed up with “spooky moderate”) “applies to a situation where reported avy danger might be lower on the rating scale, but consequences in big terrain can be disastrous.” The CAIC, the Colorado Avalanche Information Center, shares more on this phenomenon here.
Scary moderate = low probability-high consequence
Tune in, and pay attention to these signs. Rapid warming, existing (current and recent) avalanches, major storm cycles: all these signs could point to an adjustment of your plans. You might have to “dial back” your goals for the trip, or maybe even consider forfeiting the trip as a whole.
When conditions don’t line up, one of the smartest decisions you can make in avalanche terrain is to simply bail if you don’t feel confident in your ability to manage terrain and take decisive action. Lost money is never as bad as a tragic (and avoidable) avalanche accident.
Hut Trip Packing List
You’ve crossed your T’s and dotted your I’s: now it’s time to get ready to get out there. Print this page to have as a checklist for your hut trip!
Repair, First Aid, and Rescue Kits
- Splitboard/ski repair kit
- Satellite communication
- Radios (minimum 2)
- Rescue Sled
Snow Sliding Equipment of Choice
- Skis or splitboard
- Climbing skins (that you have previously cut, measured, and used for your skis/splitboard)
- Boots that you have previously broken in
- Poles
- Shovel/Beacon/Probe
- Headlamp/flashlight with extra batteries
- Small personal first-aid kit
- Leatherman or knife
- Reusable water bottle (like a Nalgene or a Hydroflask)
There is a certain art to packing your overnight ski pack for a hut trip: it has to carry everything you need in one pack. Don’t forget to share the load (i.e. split food weight) between friends! Video courtesy Dani Reyes-Acosta.
Hut Gear
- Sleeping bag
- Layered clothing – preferably not cotton – Long Johns, thermal tops, insulating layers
- Wool Socks – 1 pair per day
- Waterproof/windproof jacket/shell
- Down/synthetic coat
- Warm hat
- Warm gloves/mittens
- Extra pair of lighter gloves/mittens
- Sunglasses/goggles
- Loungewear – soft pants, cozy sweaters, warm socks
- Indoor shoes/slippers/down booties
- Personal towel, if you plan on jumping into a hot spring or alpine lake
- Personal Care Items: toothbrush & toothpaste, deodorant, sunscreen, feminine products (menstrual cups work best for minimal waste!), ibuprofen and any other medications you require. Ear plugs in the case of noisy bunk mates.
- Entertainment items: Books, games, speakers & instruments are nice to have at the end of the day. Many huts do stock some games/magazines/books. (Keep in mind that most often, there will not be any electricity to charge devices.)
- Food and beverages for all the days you’ll be out there
- Water – typically you’ll melt surrounding snow for drinking water, but some huts do have running water
OPTIONAL – string / solar lights
OPTIONAL – ridiculous costumes

No matter how your first hut trip comes together, remember that these considerations (and packing list) are just a start. The more experience you have under your belt, the better you’ll get at dialing out your systems for a hut trip.
Have something valuable to share that you’ve learned over the years? Please: share with us all in the comments below! Wishing you all safe turns and big smiles out there!
Read Dani’s full series on women in the backcountry (for funsies, and good information-sies):
Women in the Backcountry, Part 1: Why Do Women-Only Spaces Matter?
Women in the Backcountry, Part 2: Avalanche Education and Building Competency
Women in the Backcountry, Part 3: Women’s Mentorship in the Mountains
Women in the Backcountry, Part 4: The Future of Women in the Backcountry